Important: Before doing any electrical work, make sure the power is OFF. Use a voltage tester to make sure no wires are live. I don’t want to hear about any of you guys electrocuting yourselves and then blaming me, alright? Good? Moving on…
First, decide what you want your light fixture to look like. I based mine on the track lighting options I was considering for the kitchen, since I knew a long, narrow shape would work best. I mocked it up in Photoshop Elements for reference, at around 50” in length:

If you can imagine a shape composed of straight lines, you can probably create it! It helps to know a few basic plumbing pipe piece shapes and names, so you know what you have to work with. Also so you can keep a straight face as you’re rummaging through poorly organized bins and asking the plumbing department workers for the correct size nipples.


Threaded Nipples. Yes, that’s what they’re called. Snicker and then move on. These come in various lengths from miniscule 1” pieces to about a foot long. The perfect building blocks for our light fixture as they are pre-threaded on both ends.

Elbows, Tees, Flanges. These pieces are all connector pieces – they screw onto the threaded ends of nipples and let you form bends and t-shapes. The floor flange is a perfect top piece for securing your light fixture to the ceiling (more on that later).
I gathered the components for my light fixture over the course of several trips to Home Depot, basically brainstorming as I went. Lucky for you, I’ve created an inventory/shopping list below, as well as a handy budget breakdown!
For starters, I decided to use 1/2” black steel pipe. I chose the smallest diameter available to make the light fixture as light as possible. I also loved the industrial color of the black steel.
(Also, it makes me think of THIS! Oops, wait, that’s blue steel…)
Shopping List:

1. Six light fixture sockets. I can’t seem to find the exact ones I used on the Home Depot website, but this socket from Lowes is the same kind. This is the kind of socket with two screws – a silver screw for the neutral wire, and a gold screw for the hot wire. $3.24 each, $19.44 total.
2. One 1/2” floor flange. I could only find this part in a galvanized finish, so I spray-painted it to match… More on that momentarily! Approximately $6.
3. Six PVC Male 1” by 3/4” Coupling Adapters. Again, this piece was spray-painted to match, since I could only find the size and shape I needed in white PVC pipe. I chose to go with PVC pipe after searching high and low for a part that the light socket could sit up inside (see detail photos below). It doesn’t actually screw together with the other metal parts, but I was able to push the two pieces together, and then hold them taught with the wiring. Hey - it works! $1.26 each, $7.56 total.
4. Two 1/2” Black Steel Elbows. To create the arms hanging down on the left and right sides of the light fixture. $1.46 each, $2.92 total.
5. Six 1/2” x 2” Nipples. For the six short arms that hang down and connect to the light sockets. $1.24 each, $7.44 total.
6. Four 1/2” x 8” Nipples. To create the length of the light fixture. $2.76 each, $11.04 total.
7. Three 1/2” x 3” Nipples. One to hang down from the ceiling, the other to create the split portion in the center of the light fixture. $1.35 each, $4.05 total.
8. Five 1/2” Tees. To hold the arms of the light fixture. $1.86 each, $9.30 total.
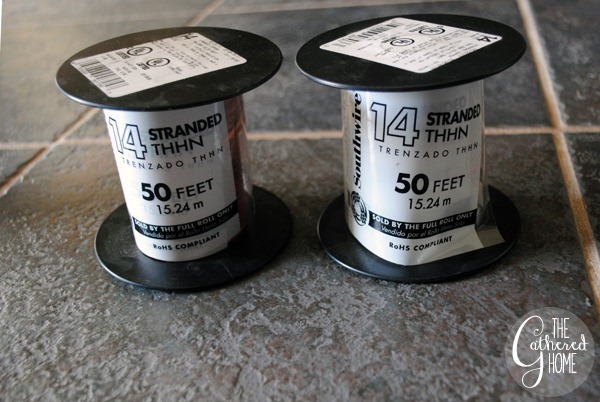
You will also need some thin wire (I used 14 stranded, but even thinner would have been helpful) in two different colors – the electrician working at Home Depot gave me white and pink because I am a girl. #Sexism. 50 feet was WAY TOO MUCH wire, but I didn’t feel like trying to do exact math and then possibly coming up short on wire. The wire total was about $22, but I maybe used $8 worth of it… I guess I’ll just have to make some more light fixtures!

And this is the spray paint I used: Rust-Oleum Bright Coat Metallic Finish Dark Bronze. It was a near perfect match for the black steel pipe:


Here are the parts all laid out so you can see how this light fixture comes together:

And assembled (and wired):

I do not have any pictures of the wiring process. I followed these directions, so I’m going to point you there instead of trying to go into full detail here. Basically, you need to wire the light fixture while you are assembling it. I started with the farthest arms and worked my way inward, screwing the pipes together as I went.
Closeup photos. You can see how the light socket fits up inside the PVC adapter:


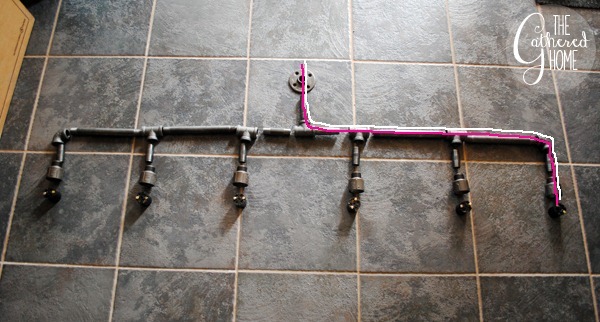
String a length of white wire and pink wire [or black, or whatever color your “hot” wire is] through all the straight pieces along one arm, down the elbow, through the nipple and the coupling adapter, and wire the light socket according to the wiring instructions (careful to attach the neutral wire to the silver screw, and the hot wire to the gold screw). To be extra safe, I wrapped the top of my socket with electrical tape to make sure no wires would make contact with any part of the light fixture.
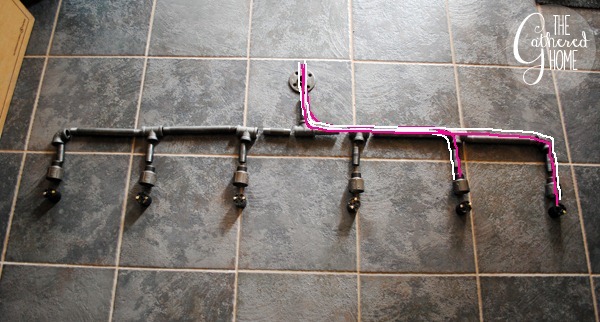
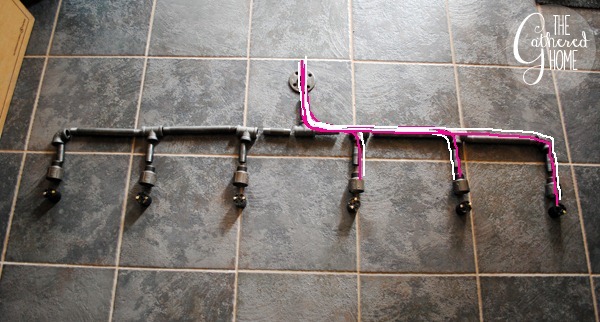
Behold my glorious Photoshopped illustration below:

Repeat for each arm of the light fixture:


By the time you are finished, you will have six neutral wires and six hot wires coming out the top.
Twist together all the pink/black wires, and then twist together all the white wires. This way you can connect all the neutral wires to the one white wire in the ceiling junction box, and then all the hot wires to the one black wire in the ceiling junction box, using a plastic wire nut for each connection. (Again, check out these instructions for visuals!)
Actually hanging the light fixture was beyond my expertise, so I called in my dad to do the honors. As such, I do not have advice besides: have someone who knows how to do these things do them for you. If you are the one who knows how to do this, then you’re golden. (I am beyond impressed!)
To me, electricity is akin to black magic, and I prefer not to dabble in something I of which I know so little…
Here is a closeup shot so you can see how we hung the light fixture:

That is a 7” wooden plaque from Michael’s ($1.99) painted with white ceiling paint and with a 3/4” thick hole drilled through the center.
[At this point, double check that the power is off. I know you already did, but do it again anyway.]
We first mounted the wooden plaque to the junction box, then pulled the wires through the center hole. We attached the wires with wire nuts and then shoved them back up into the junction box through the hole in the center of the plaque. Then we screwed the metal floor flange onto the wooden plaque.
Stepped down, flipped the switch.

If all your connections are good, this is what you’ll see!
Given the conductivity of metal, we used the voltage tester to double check that the pipe did not have live electricity flowing through it. Sigh of relief. No one’s getting electrocuted changing a light bulb around these parts!
Now, at this point, your arms will be tired from holding the light fixture up to make the electrical connections, but your heart will be warmed and your eyes will be blinded by the supernova of incandescent delight happening above your head. God bless those 60-watt energy hogs.
(Would Edison bulbs look fantastic in an industrial light fixture such as this? Yes, indeed they would. But goodness knows I am much too cheap to spend that much on a single light bulb. So I settled for clear round bulbs, and I love them just as much. $13 for six.)
Speaking of which, are you ready for this budget breakdown???
Plumbing pipe parts and fittings: $48.31
Light Bulb Sockets: $19.44 (You could find a cheaper source for these on the Internet, fyi.)
Spray Paint: $5
Wire: $22 (If you already have this, awesome. Or if you can bum some from someone who has extra… Like me… Even better!)
Wooden Plaque: $2
TOTAL: $97.
Not counting the light-bulbs. Because light bulbs aren’t sexy. And I like to think that I kept this project under $100.
NOT BAD for totally rad, industrial, modern, hand-made awesomeness!

So what are you waiting for? Get thee to Home Depot in throngs and greatly perplex them as to why their plumbing department is full of crazy-eyed people searching high and low for the right-sized nipples! (What? It’s a plumbing term. I am simply trying to be technically correct!)
source
i really like this article please keep it up.
ReplyDeletetop-5-best-air-hammers